>>

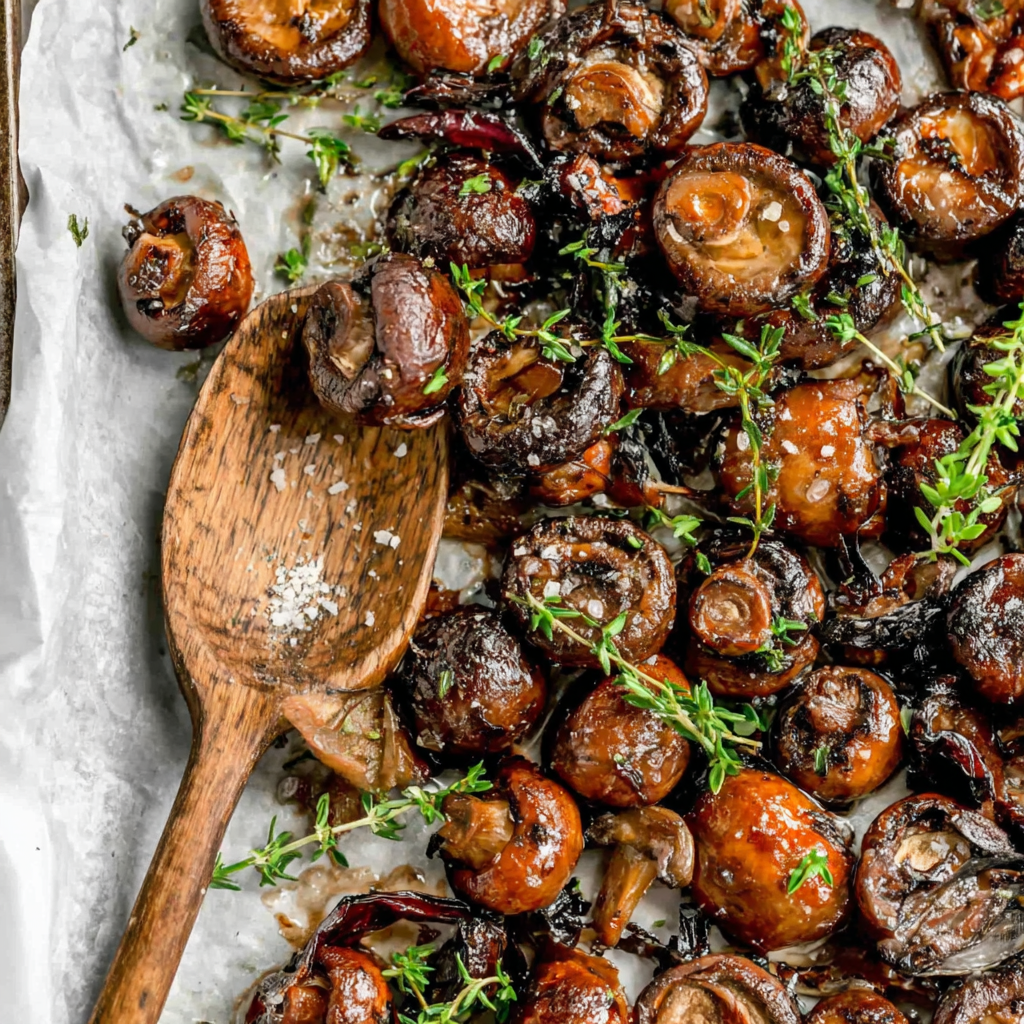
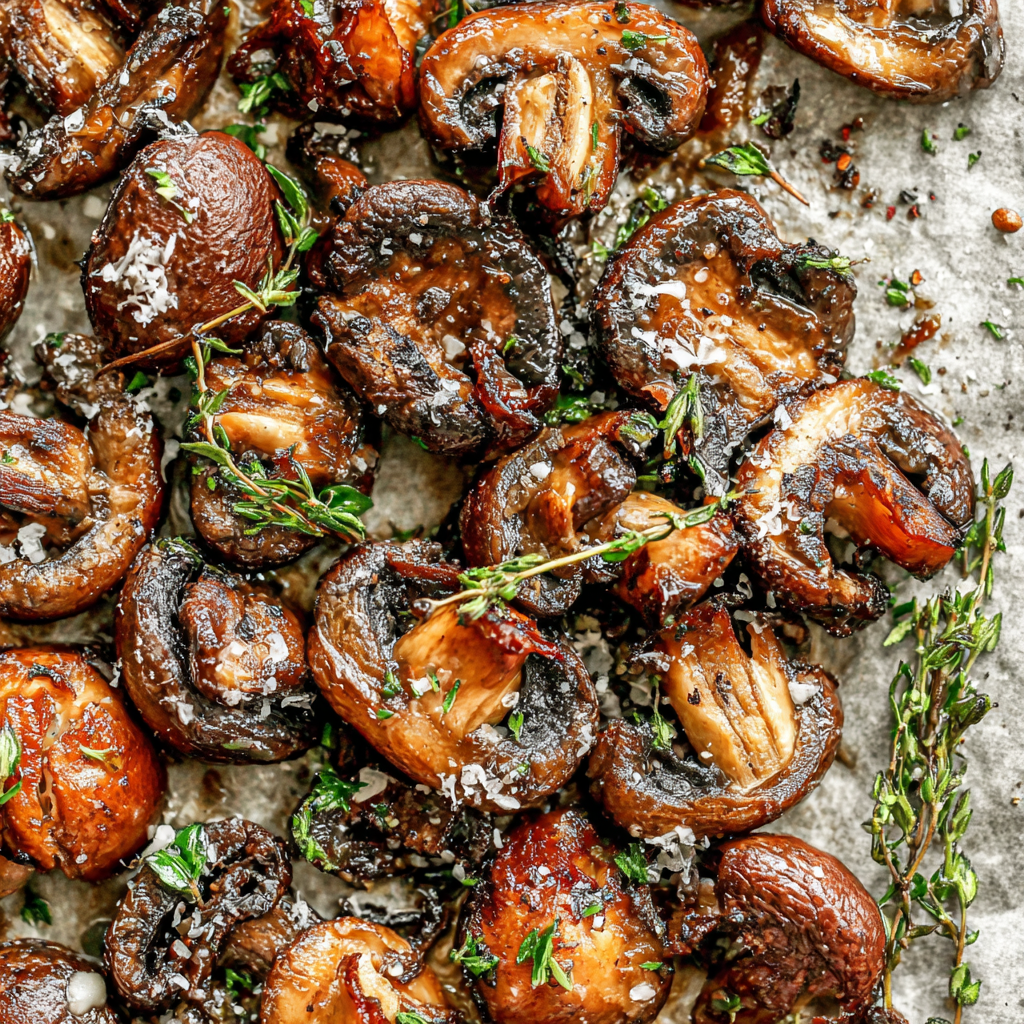
Perfectly crisp, golden roasted mushrooms flavored with garlic and fresh thyme — an easy, elegant side or appetizer ready in under an hour.
I often roast a double batch for gatherings because they disappear fast. Family members and friends always comment on the deep, almost meat-like umami and the satisfying brittle edges — small, flavorful bites that pair with everything from crusty bread to roasted chicken. The technique is what makes it special; once you master spreading the slices in a single layer, the rest is delightfully forgiving.

My favorite aspect is how economical and transformative this method is: inexpensive mushrooms become concentrated bites of flavor that could easily pass for something more elaborate. I once served these as part of a vegetarian tasting menu, and guests complimented the intense umami and how the thyme brightened the richness. Small adjustments — thinner slices, a touch more oil, a minute less or more in the oven — let you tune the crispness to your preference, which makes this technique endlessly adaptable.
Cool completely before storing to avoid condensation. Keep in an airtight container in the refrigerator for up to 3 days — use shallow containers to prevent steam buildup. For freezing, flash-freeze in a single layer on a tray, then transfer to a freezer bag for up to 3 months; reheat from frozen in a 425°F oven for 8–12 minutes. When reheating, sprinkle a few drops of oil on the tray to revive crispness and watch closely to avoid burning.
If you don’t have all three mushroom types, use two or a single variety: cremini or button mushrooms work well and are widely available. Replace olive oil with avocado oil for a higher smoke point or melted butter for added richness (not vegan). Swap thyme for rosemary (use sparingly) or sage for autumnal notes; minced shallot can replace garlic if you prefer a subtler allium flavor. Adjust oil quantity slightly when using very small mushrooms or pre-sliced supermarket packs.
Serve as an elegant appetizer with tahini yogurt or a lemony aioli for dipping, or toss with toasted farro, wilted greens and a splash of sherry vinegar for a warm grain salad. They’re brilliant spooned over creamy polenta, as a topping for crostini with ricotta, or alongside roasted chicken or steak. Garnish with flaky sea salt, a squeeze of lemon, or a drizzle of good-quality olive oil to enhance the flavors.
Roasting vegetables to concentrate flavor is common across many cuisines; this approach to mushrooms echoes rustic French preparations where herbs and high heat are used to deepen umami. In European bistros, mushrooms are often pan-roasted — this oven method scales easily and creates more consistent crispness for larger batches while preserving the classic herb-and-garlic pairing found in traditional preparations.
In spring, use a mix of more delicate wild mushrooms and add a scatter of fresh peas or chopped tarragon after roasting. For autumn and winter, include chestnuts or roasted shallots on the tray and finish with a splash of aged balsamic. For holiday gatherings, fold roasted mushrooms into a warm lentil salad with roasted squash and toasted pumpkin seeds for seasonal depth.
Roast a double batch and portion into shallow containers for up to three days of easy sides. Re-crisp in a hot skillet with a teaspoon of oil for each serving, or reheat in a 425°F oven for 6–8 minutes. Pair with make-ahead grain salads, roasted proteins, or fold into omelets and sandwiches for quick lunches. Label containers with date and intended use to rotate through your weekly menu.
These mushrooms are small wonders: quick to make, versatile at the table, and reliably delightful. Try them once and you’ll find countless ways to incorporate them into meals — they are one of those uncomplicated techniques that rewards experimentation and sharing.
Spread mushrooms in a single layer to avoid steaming — crowded trays release moisture and prevent browning.
Add sliced garlic and fresh thyme only in the final 5 minutes to prevent bitter, burnt garlic.
If the tray pools liquid, carefully drain it halfway through roasting to keep slices crisp.
Re-crisp leftovers in a hot skillet or 425°F oven for the best texture.
This nourishing crispy roasted mushrooms with garlic & thyme recipe is sure to be a staple in your kitchen. Enjoy every moist, high protein slice — it is perfect for breakfast or as a wholesome snack any time.
This Crispy Roasted Mushrooms with Garlic & Thyme recipe makes perfectly juicy, tender, and flavorful steak every time! Serve with potatoes and a side salad for an unforgettable dinner in under 30 minutes.
Preheat the oven to 400°F (200°C) and position a rack in the center to ensure even heat circulation.
Gently remove soil with a damp cloth or quick rinse, then pat dry. Slice chestnut and shiitake about 1/8 inch thick; tear oyster mushrooms into uniform pieces.
Spread mushroom slices in a single layer on a parchment-lined baking sheet. Drizzle the olive oil evenly and sprinkle with black pepper and salt.
Roast undisturbed for 20 minutes to allow moisture to evaporate and the surfaces to begin caramelizing. If liquid pools on the tray, carefully drain.
Use a fork to flip each slice so the other side browns. Roast another 20 minutes, checking for even golden color; add a little oil or extra time if necessary.
Scatter the sliced garlic and thyme sprigs across the tray about 5 minutes before the end. Roast until garlic is golden and mushrooms have crisp edges, another 4–6 minutes.
Remove from oven, let rest 2–3 minutes to firm up, garnish with additional thyme or a sprinkle of flaky sea salt, and serve hot.
Last Step: Please leave a rating and comment letting us know how you liked this recipe! This helps our business to thrive and continue providing free, high-quality recipes for you.
Leave a comment & rating below or tag
@feastara on social media!
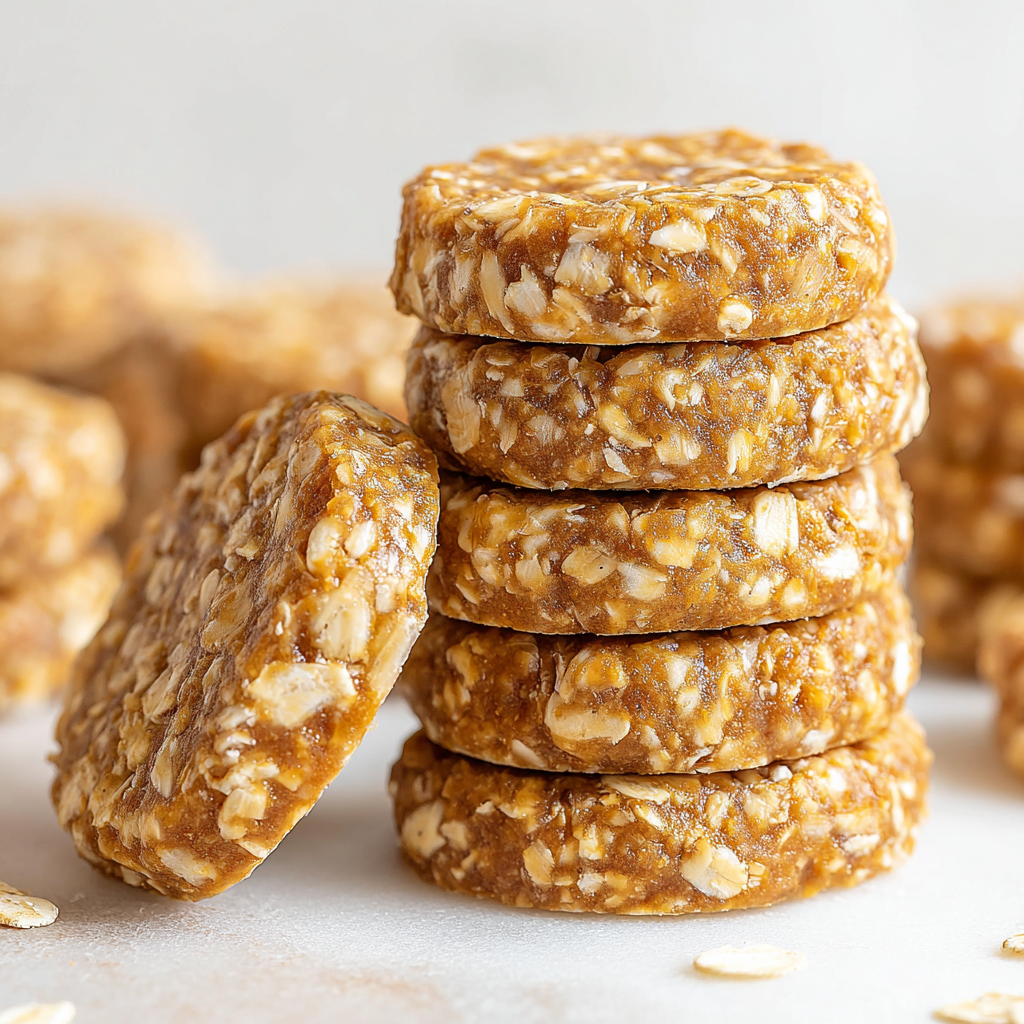
Buttery oatmeal cookie cups filled with warm, cinnamon-spiced apple pie filling and a sweet glaze for cozy, handheld comfort.
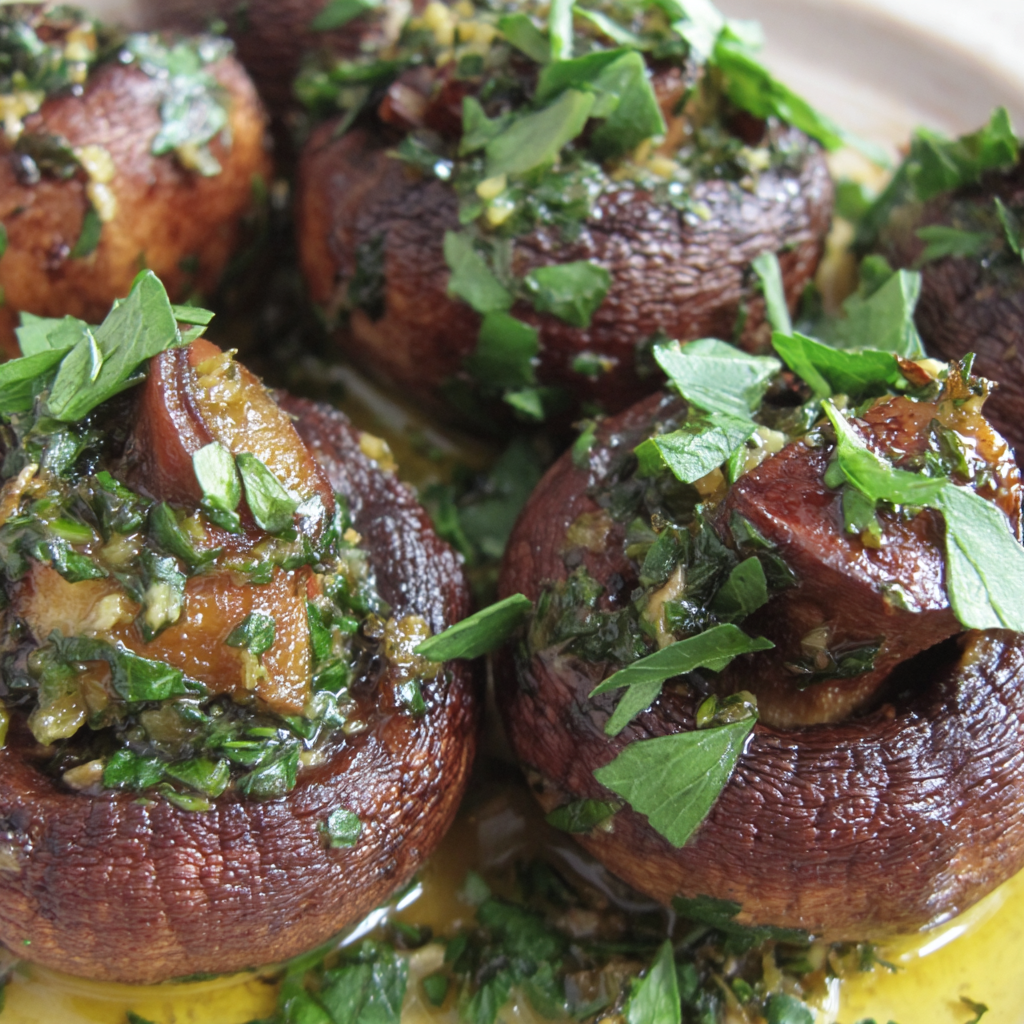
Tender mushroom caps filled with garlicky Provençal herbs, bright lemon, and olive oil. A cozy, elegant AIP-friendly appetizer ready in under an hour.
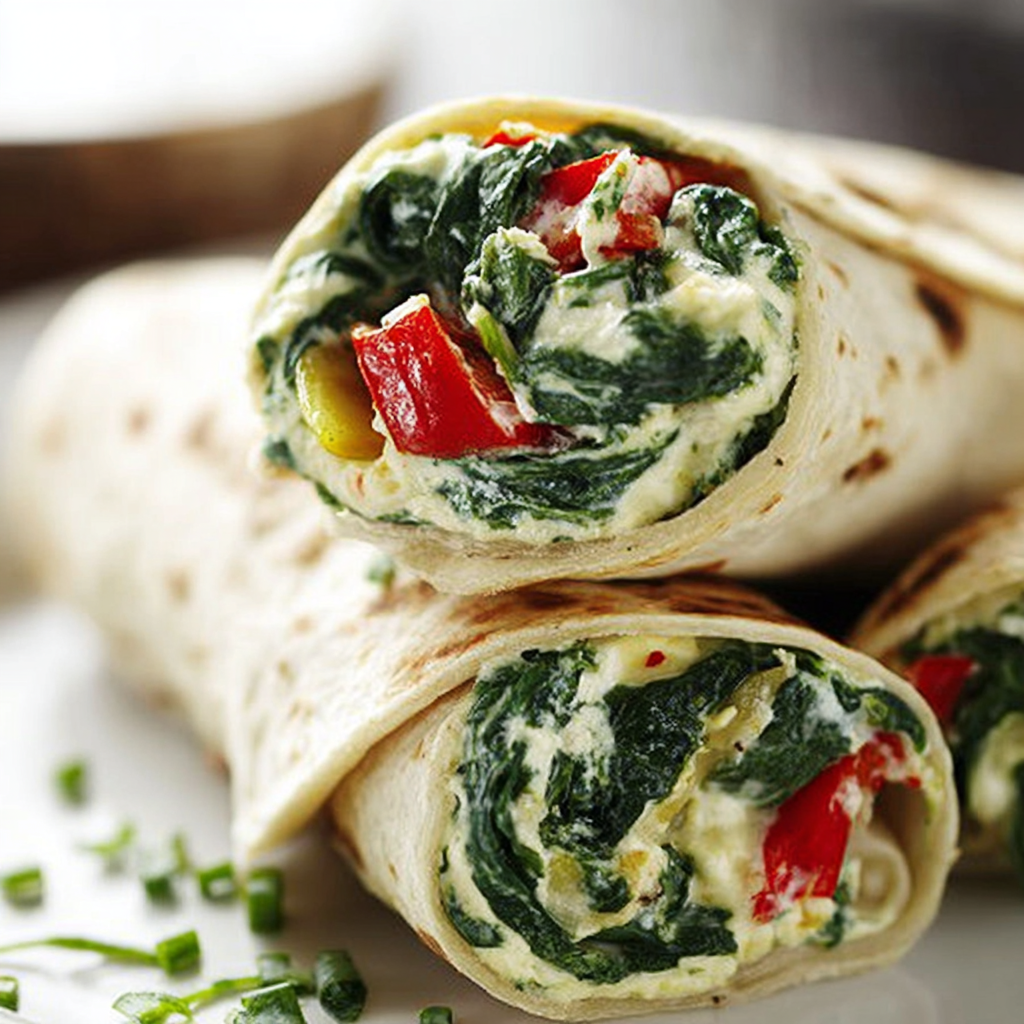
Creamy spinach, peppers, and tangy feta tucked in warm tortillas, baked golden for an easy make-ahead lunch or freezer-friendly snack.
Leave a comment & rating below or tag @feastara on social media!
Enjoyed this recipe? Share it with friends and family, and don't forget to leave a review!
This recipe looks amazing! Can't wait to try it.
Comments are stored locally in your browser. Server comments are displayed alongside your local comments.

Join to receive our email series which contains a round-up of some of our quick and easy family favorite recipes.