>>

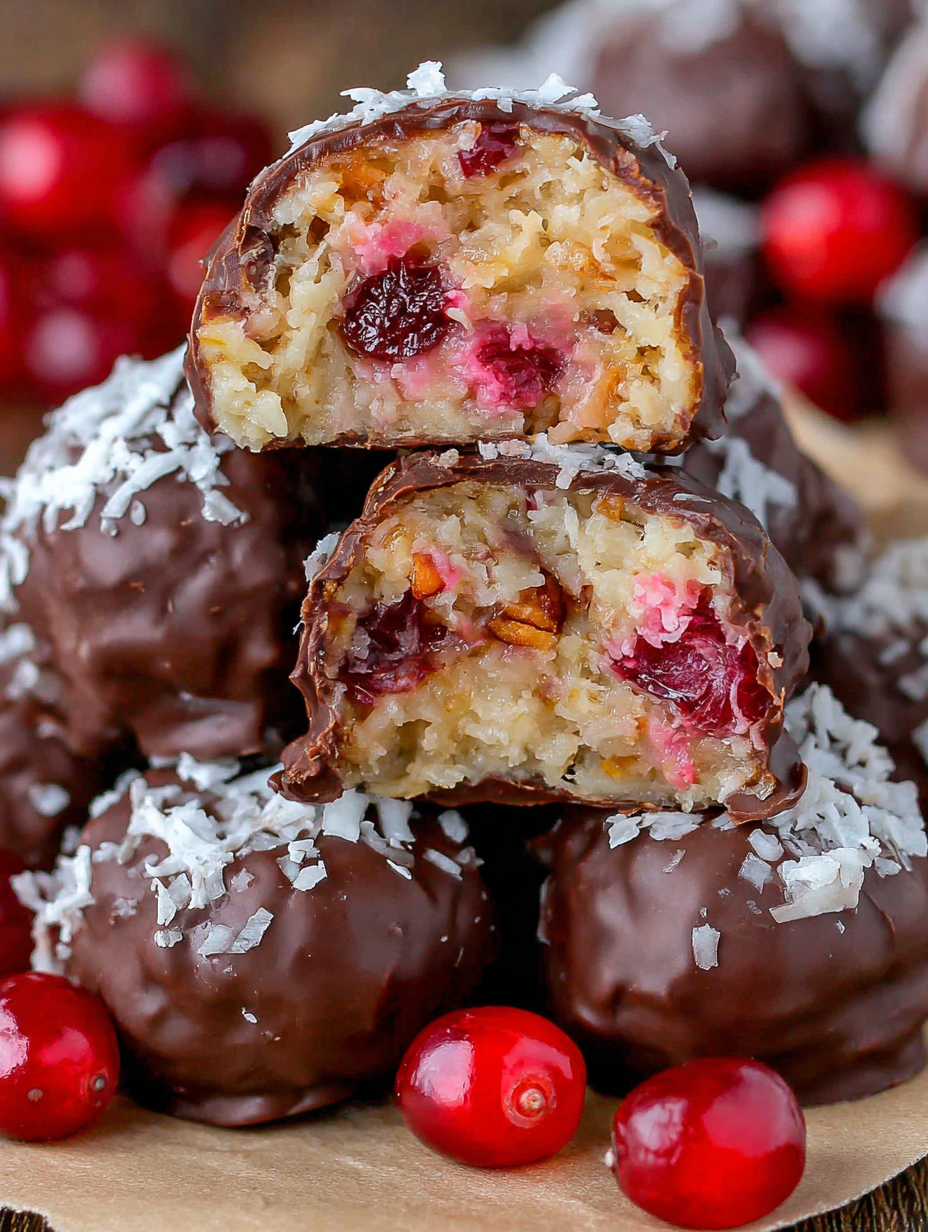
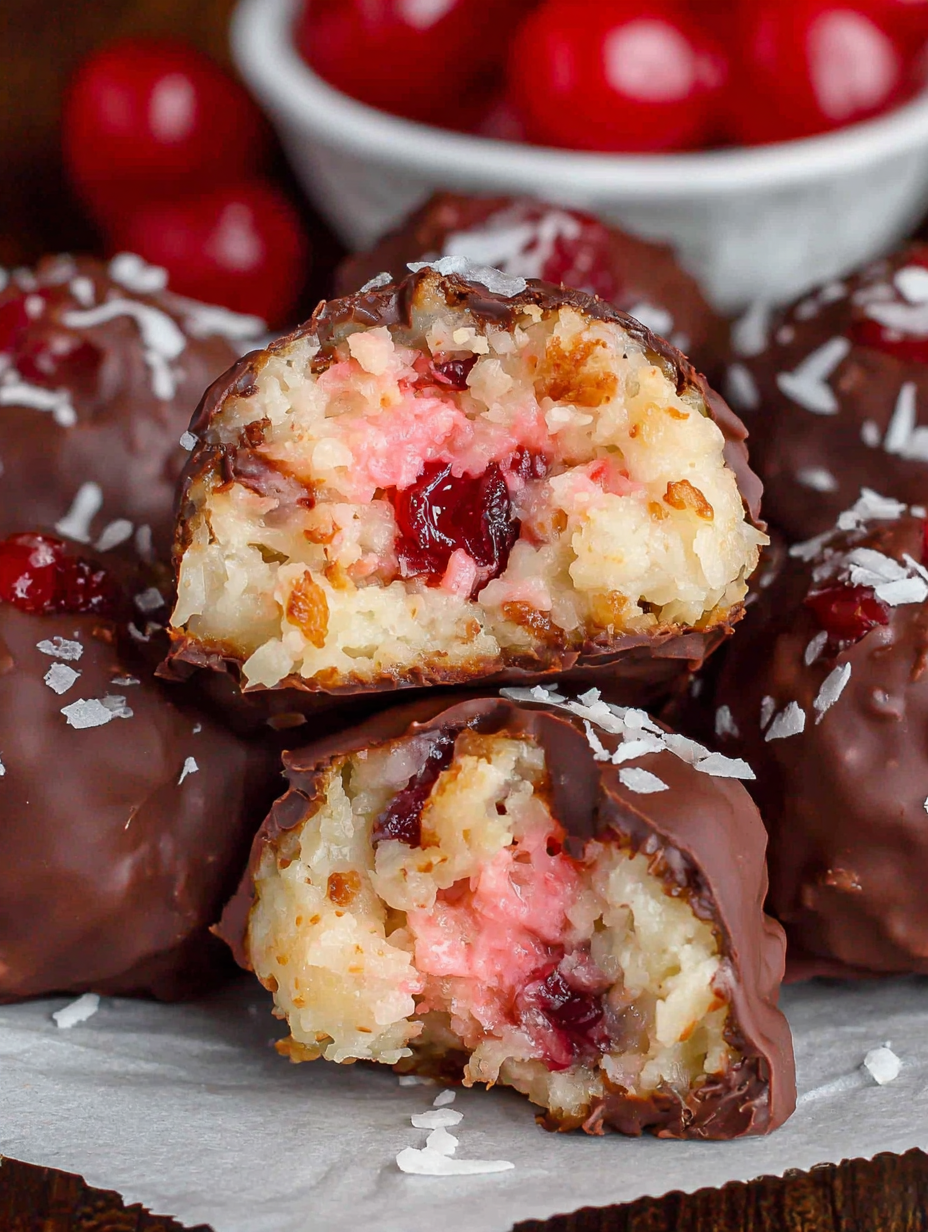
Old-fashioned Martha Washington candies with coconut, pecans, and cherries — easy to make, festive, and perfect for holiday cookie trays and gift boxes.
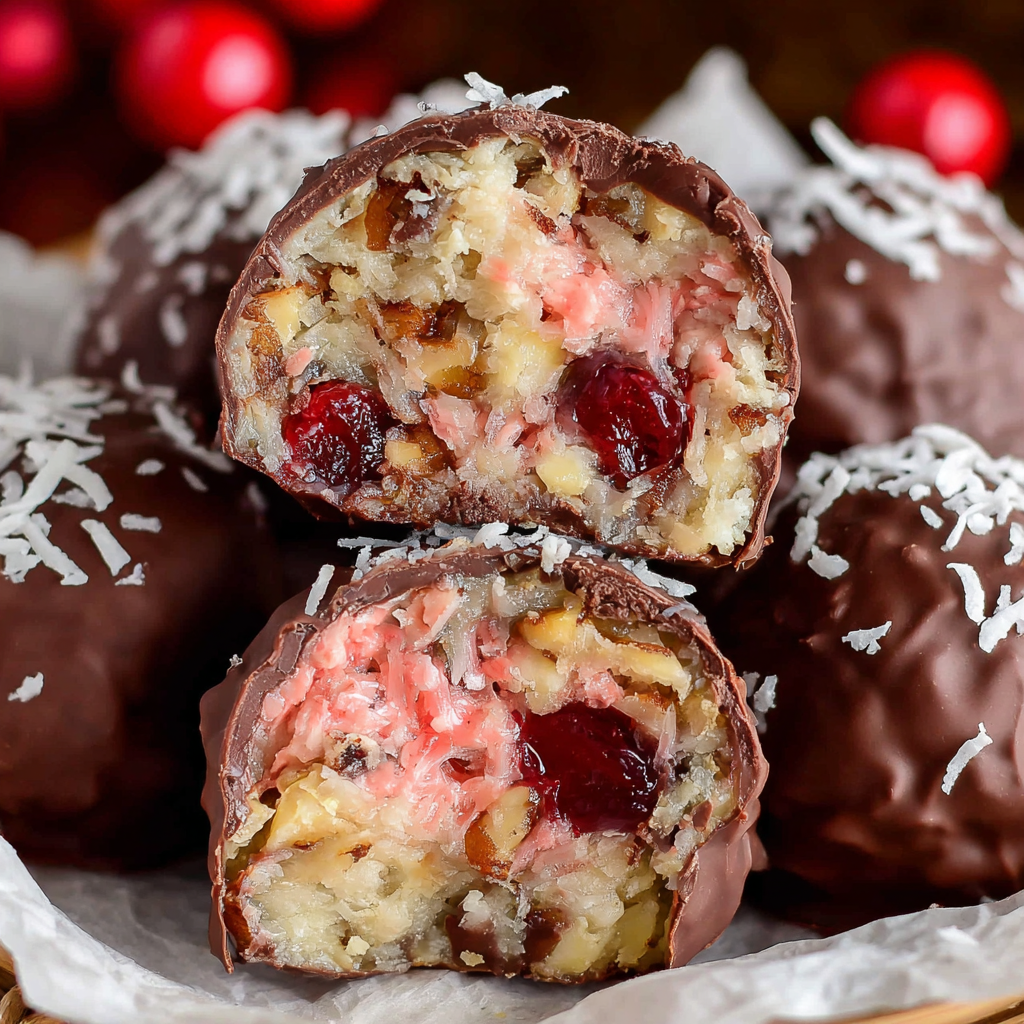
This Martha Washington candy has been a holiday staple in my kitchen for as long as I can remember. I first tasted a version of this old-fashioned confection at a neighbor's cookie exchange when I was a teenager; the combination of sweet shredded coconut, buttery powdered-sugar filling, bright maraschino cherries, and the crunch of pecans felt nostalgic and utterly irresistible. I recreated the recipe years later for a family Christmas gathering and tweaked the texture until it matched that perfect balance of tender, nutty, and sweet. It’s one of those sweets that manages to be both elegant on a cookie tray and comforting when you sneak one from the tin late at night.
What makes this version special is its simplicity and the show-stopping presentation. The filling comes together with just a few pantry-friendly ingredients and a short chill, then you dip each piece in a smooth candy coating for a glossy finish. The finished candies hold up well for gifting, stacking neatly in boxes or layered in mason jars lined with parchment. Over the years I've learned small but useful tricks — drying the cherries well, chilling the filling thoroughly, and tapping off excess coating to avoid unsightly chocolate pools — that make a big difference in the final result. These are the candies I pack into tins for neighbors, bring to parties, and always save a few for ourselves.
I’ve gifted these for years and the reaction is always the same — delighted surprise that such a classic candy is so easy to make at home. I love the way the cherries peek through in the filling and the pecan crunch that cuts the sweetness; it’s a combination that sparks holiday memories for everyone who tries them.
My favorite part of making these is the assembly line rhythm: mixing, chilling, shaping, and dipping while holiday music plays in the background. I’ve lost count of how many tins I’ve wrapped and sent to friends — the candies always spark memories of kitchen conversations and cozy evenings sampling the tray.
Store finished candies in an airtight container at room temperature for up to two weeks; layer with parchment to prevent sticking. If your home is warm, keep the container in the coolest part of the house away from direct sunlight. For longer storage, freeze uncoated filling balls on a tray until firm, then transfer to a freezer-safe bag for up to three months. When ready to finish, dip from frozen; the coating will set slightly differently but the candy will still be delicious. To revive gloss on slightly dulled coatings, bring the candies to room temperature gently — do not microwave.
If you need to swap ingredients, try toasted walnuts or almonds in place of pecans for a different nutty note, or replace maraschino cherries with finely chopped dried cherries rehydrated briefly and patted dry. For a dairy-free version, use vegan butter and a dairy-free sweetened condensed milk alternative; the texture will be slightly different but still tasty. If you prefer less sweetness, use unsweetened shredded coconut and reduce powdered sugar by 1–2 cups, adjusting until the mixture holds together. For coating, high-quality dark chocolate gives a richer finish but may require tempering if you want a firm snap.
Arrange the candies on a festive tray with sprigs of fresh rosemary or holly for holiday gatherings, or stack them in small boxes tied with ribbon for gifts. They pair beautifully with strong coffee, black tea, or a nutty dessert wine. For an elegant dessert platter, alternate Martha Washington candies with shortbread and spiced cookies to balance sweetness and texture. Garnish the tray with lightly toasted pecan halves for a rustic, seasonal look.
Martha Washington candies are a classic American holiday confection with roots in early 20th-century home cooking. They reflect a tradition of simple, shelf-stable sweets that families made for celebrations and gifting. Though regional variations exist — some use different nuts or omit cherries — the hallmark is a soft, coconut-rich filling coated in chocolate. These candies evoke a nostalgic holiday aesthetic and are often included in multi-generational cookie exchanges across the United States.
For a summer celebration, swap maraschino cherries for finely chopped glacé cherries or freeze-dried strawberries for a different color and tang. In winter, add a pinch of cinnamon or ginger to the filling for warmth, or stir in a teaspoon of rum or bourbon for an adult twist — reduce the condensed milk slightly to compensate for added liquid. Around Valentine’s Day, use pink-tinted candy melts and heart-shaped boxes to present them as a homemade treat.
Prepare the filling ahead of busy holiday weeks: make the mixture and chill for up to two days, then portion and roll the balls the day you plan to finish and dip. Use an ice cream scoop to portion evenly for consistent size and cooking time. Keep a small bowl of powdered sugar nearby to dust your hands if the mixture becomes sticky while rolling. Work in batches when dipping to avoid cooling and thickening of the coating; reheat gently if needed following package instructions.
These candies are a joyful reminder that some of the best gifts are the ones you make by hand. They’re approachable, forgiving, and reliably festive — give them a try and make them your own with a favorite nut, a splash of spirit, or a touch of sea salt on top.
Pat cherries thoroughly dry on paper towels to prevent a soggy filling.
Chill the mixture for at least two hours — cold filling shapes and dips much better.
Tap off excess coating to avoid pooling on the bottom and use parchment for easy cleanup.
Use a small ice cream scoop for uniform balls and consistent yield.
Toast pecans lightly for extra depth of flavor before chopping.
This nourishing martha washington candies recipe is sure to be a staple in your kitchen. Enjoy every moist, high protein slice — it is perfect for breakfast or as a wholesome snack any time.
Yes. Make the filling up to 48 hours ahead and keep it covered in the refrigerator. Shape and dip within two days for best texture.
If you work in a warm kitchen, chill the balls on a tray before dipping and work in small batches to keep the coating smooth.
This Martha Washington Candies recipe makes perfectly juicy, tender, and flavorful steak every time! Serve with potatoes and a side salad for an unforgettable dinner in under 30 minutes.
Chop maraschino cherries finely and spread on paper towels. Press with additional towels until as dry as possible to avoid excess moisture in the filling.
In a large bowl combine melted butter, powdered sugar, vanilla, shredded coconut, sweetened condensed milk, chopped cherries, and chopped pecans. Stir until a cohesive, slightly sticky dough forms.
Cover and refrigerate the bowl for at least two hours. Cold filling firms up and becomes much easier to shape into balls.
Scoop about 1-inch portions (walnut-size) and roll into balls. Place on a parchment-lined tray and chill for 20 minutes to firm before dipping.
Melt candy coating according to package directions, keeping it smooth and warm, not overheated. Use microwave bursts or a double boiler.
Dip chilled balls into melted coating, tapping off excess, and place on parchment to set. Trim any pooled coating after set for a neat base.
Store in an airtight container at room temperature for up to two weeks. Layer with parchment to prevent sticking.
Last Step: Please leave a rating and comment letting us know how you liked this recipe! This helps our business to thrive and continue providing free, high-quality recipes for you.
Leave a comment & rating below or tag
@feastara on social media!
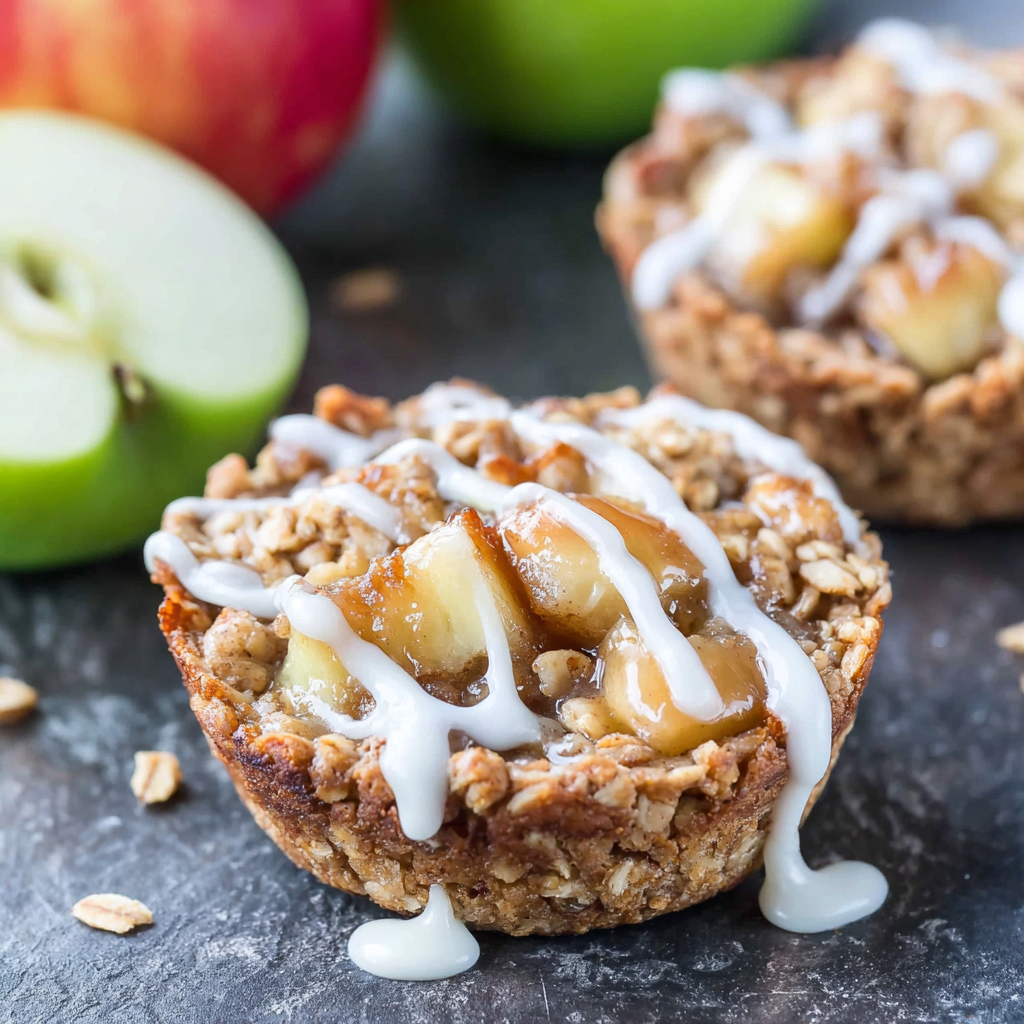
Buttery oatmeal cookie cups filled with warm, cinnamon-spiced apple pie filling and a sweet glaze for cozy, handheld comfort.
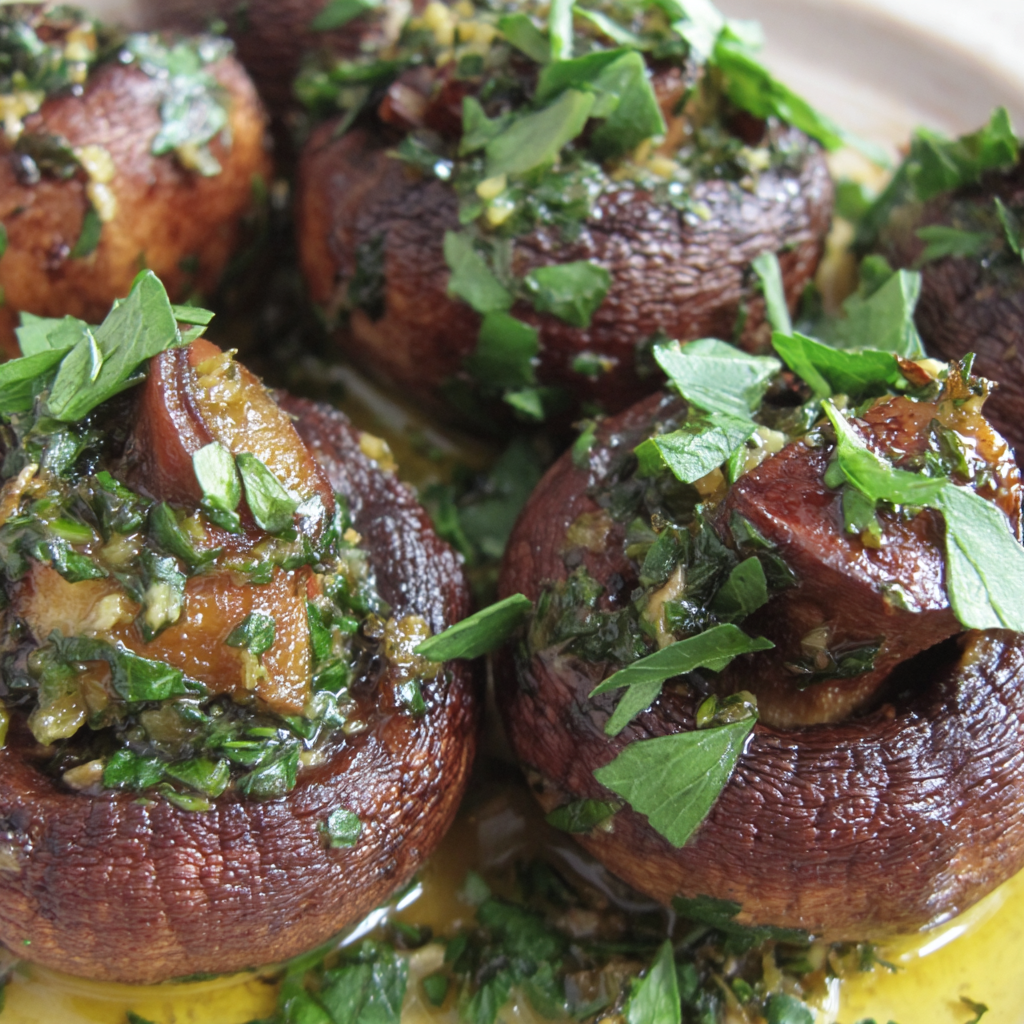
Tender mushroom caps filled with garlicky Provençal herbs, bright lemon, and olive oil. A cozy, elegant AIP-friendly appetizer ready in under an hour.
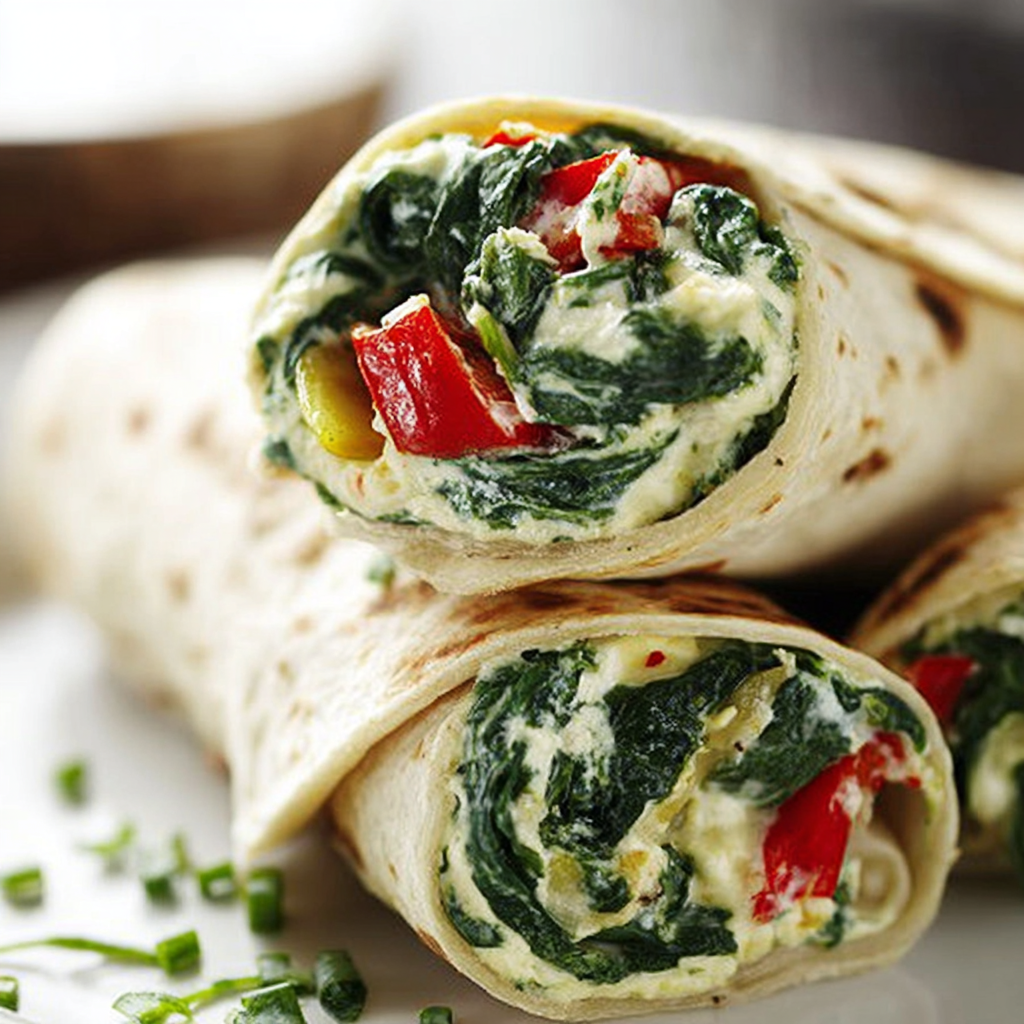
Creamy spinach, peppers, and tangy feta tucked in warm tortillas, baked golden for an easy make-ahead lunch or freezer-friendly snack.
Leave a comment & rating below or tag @feastara on social media!
Enjoyed this recipe? Share it with friends and family, and don't forget to leave a review!
This recipe looks amazing! Can't wait to try it.
Comments are stored locally in your browser. Server comments are displayed alongside your local comments.

Join to receive our email series which contains a round-up of some of our quick and easy family favorite recipes.