>>

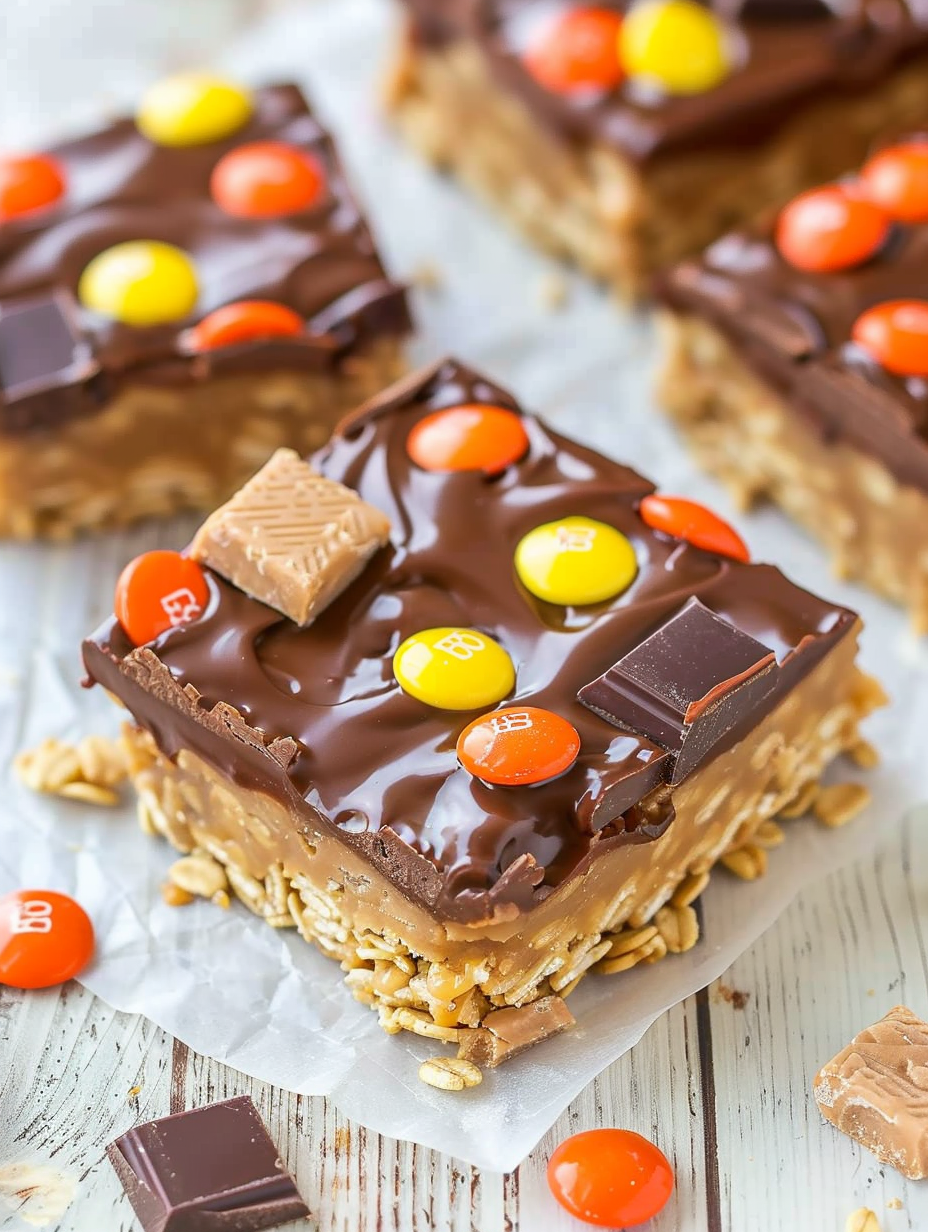
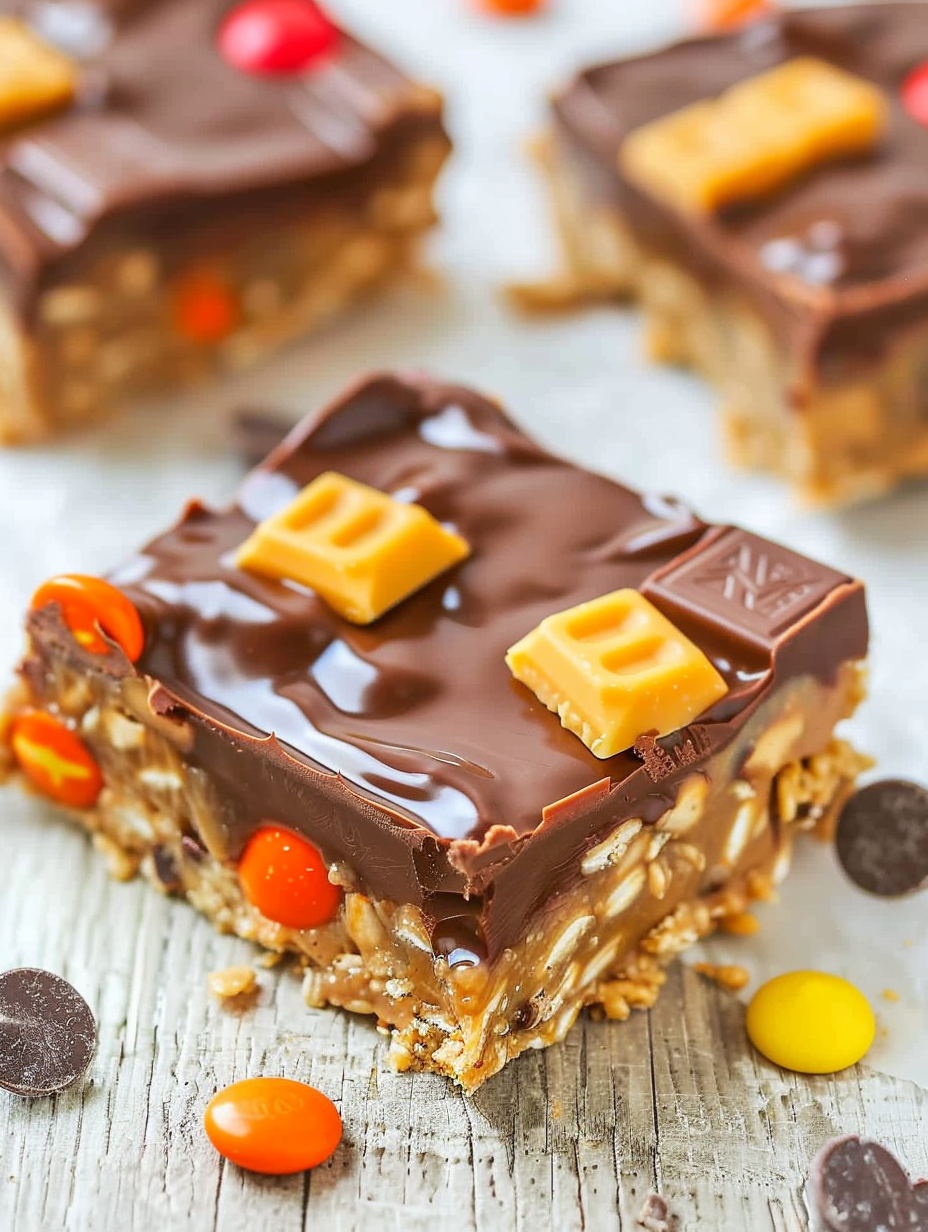
These no-bake peanut butter candy bars are soft, chewy, and loaded with peanut butter and chocolate — a simple, crowd-pleasing treat you can make in minutes and let set.
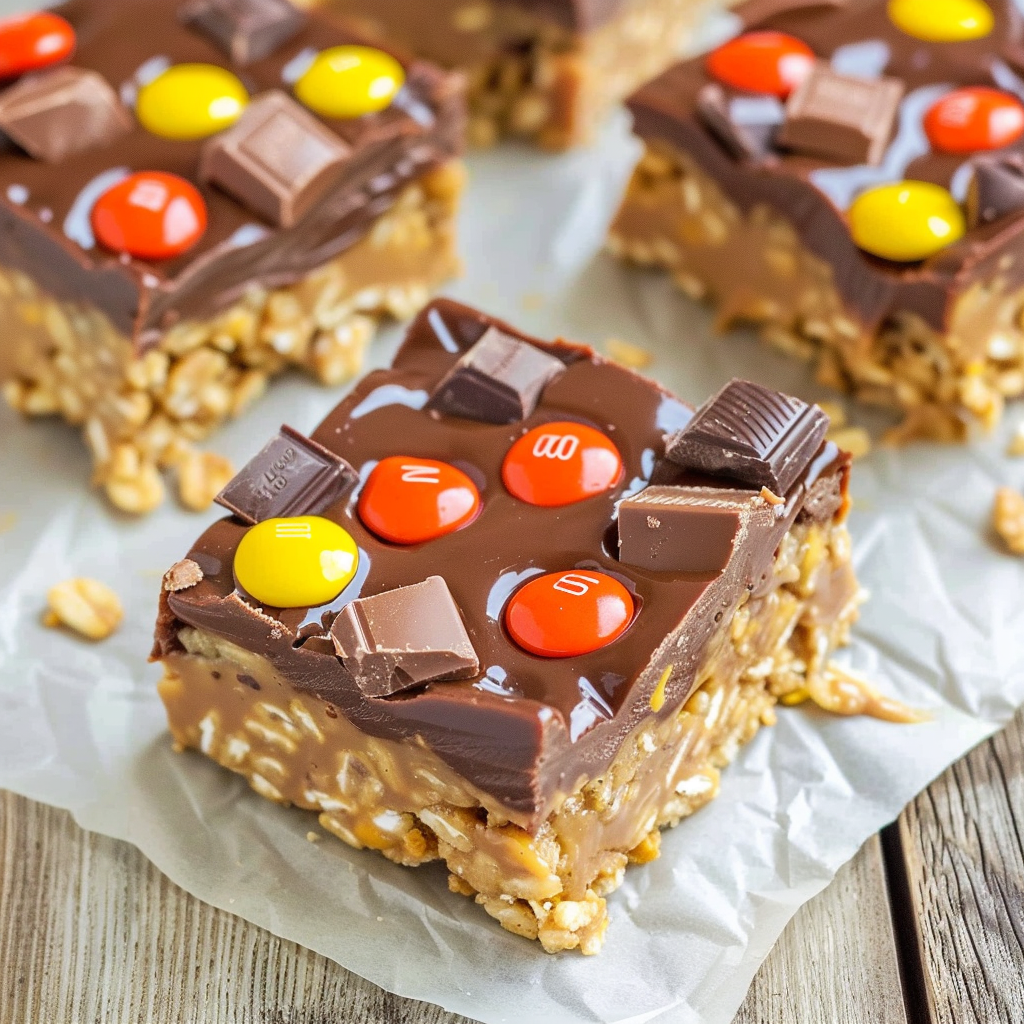
This recipe for chocolate peanut butter candy bars has been a weeknight lifesaver and a party staple in my house for years. I first stumbled across this combination during a holiday cookie swap when I wanted something that didn’t require an oven but still felt indulgent. The result was an instant hit: layers of dense, chewy peanut butter cereal base topped with a glossy chocolate layer studded with bite-sized candy pieces. The texture is what keeps everyone coming back — soft and slightly springy from the peanut butter and cereal, with a silky chocolate cap and crunchy candy pockets.
I love making these when I need a quick dessert that travels well. They set at room temperature, so there’s no worry about melting in transit, and they keep for days in a sealed container. The flavor is bold peanut butter up front with a counterpoint of semi-sweet chocolate; the candy pieces on top add texture and playful surprise in every bite. My kids insist on helping assemble the topping and choose which candies to add, which has become a cheerful tradition whenever friends drop by or when we need an easy bake sale item.
From my perspective, these bars are a little nostalgic and a little modern — they remind me of cereal bars from childhood but elevated with better chocolate and grown-up candies. Family gatherings always result in a request for the recipe, and I love tweaking the topping from time to time to suit the season or whoever I'm serving.
One of my favorite parts of making these is watching people’s faces the first time they bite into them: the dense peanut butter base is unexpectedly soft and chewy, then you get the chocolate and candy crunch. These bars have appeared at bake sales, potlucks, and a few emergency dessert situations — and they rarely come home with me.
Store the bars in an airtight container at room temperature for up to one week. Place parchment between layers to prevent sticking. For longer storage, refrigerate for up to one month; allow refrigerated bars to come back to room temperature before serving so the chocolate regains its smooth mouthfeel. For very long-term keeping, freeze individual bars in a single layer on a sheet pan until solid, then pack into a freezer-safe container with layers separated by parchment; thaw in the refrigerator or at room temperature when ready to eat. Avoid storing in direct sunlight or warm kitchens to prevent chocolate melt.
If you need a peanut-free version, substitute creamy almond butter or sunflower seed butter at a 1:1 ratio, though flavor will shift and the texture may be slightly softer. To make these gluten-free, swap Special K for a certified gluten-free crisp rice cereal or crushed gluten-free cornflakes. If you prefer less sweetness, reduce granulated sugar to 3/8 cup and brown sugar to 3 tablespoons, but remember the sugars contribute to the chew and binding. You can swap semi-sweet chips for milk or dark chocolate chips depending on preference; adding 1 teaspoon of coconut oil to the chocolate helps melting but will slightly thin the topping.
Cut into 9 generous squares and serve at room temperature for the best texture. These pair wonderfully with a glass of cold milk or a rich espresso for contrast. For parties, arrange on a platter with fresh berries or salted nuts to balance sweetness. Garnish with a light sprinkle of flaky sea salt on the chocolate before it sets to enhance the peanut butter flavor. For a festive twist, top with crushed peppermint in winter or chopped roasted peanuts and a drizzle of caramel for a salty-sweet accent.
Peanut butter and chocolate is a classic American flavor pairing with roots in early 20th-century confectionery. Cereal-based bars evolved as a convenient, no-bake snack during times when quick, shelf-stable treats were desirable. This recipe riff blends that heritage with modern candy-bar influence — think cereal bars crossed with candy toppings — and reflects the American love for portable, indulgent sweets that can be customized with popular chocolate candies.
In summer, choose lighter candies like mini peanut butter cups and add a pinch of sea salt for a refreshing contrast. For holidays, swap the candy topping for crushed peppermint, toasted coconut, or candied orange peel. In colder months, use darker chocolate and scatter toasted chopped pecans or walnuts on top before the chocolate sets. You can also fold mini marshmallows into the topping for a rocky road-style variation in autumn gatherings.
Make the base layer in the morning and keep it loosely covered; prepare the chocolate topping and candies shortly before you want them to set so the chocolate is freshly melted and glossy. If you’re packing these for lunches or events, wrap individual bars in parchment and store in a sturdy container to protect the chocolate finish. For bake sales, package them in clear bags tied with a ribbon and label for allergens; offering small sample squares can help sales.
These bars are simple, forgiving, and endlessly adjustable. Whether you’re making them for a crowd or a quiet afternoon treat, they deliver big flavor with minimal fuss — and they’re one of the first recipes people ask me to bring to gatherings. Enjoy making them your own.
Press the cereal mixture firmly and evenly into the pan so the bars hold together when sliced.
Warm the chocolate in short bursts and stir between intervals to avoid scorching and ensure a glossy finish.
Use an 8x8-inch pan lined with foil for easy removal; allow foil to overhang for lifting the whole slab out.
If you want a glossier top, swirl 1 teaspoon of light corn syrup into the melted chocolate before spreading.
This nourishing no-bake chocolate peanut butter candy bars recipe is sure to be a staple in your kitchen. Enjoy every moist, high protein slice — it is perfect for breakfast or as a wholesome snack any time.
Room-temperature setting is preferred because refrigeration can cause chocolate to bloom and create condensation when brought back to room temp; however, refrigerating speeds setting if needed.
Use commercial creamy peanut butter brands like Jif or Skippy. Natural peanut butter separates and is thinner, which affects the texture and binding.
This No-Bake Chocolate Peanut Butter Candy Bars recipe makes perfectly juicy, tender, and flavorful steak every time! Serve with potatoes and a side salad for an unforgettable dinner in under 30 minutes.
Line an 8x8-inch pan with aluminum foil with an overhang and lightly spray the foil with nonstick spray.
Combine peanut butter, corn syrup, granulated sugar, and brown sugar in a large microwave-safe bowl. Heat 1 minute on high, stir, heat another 1 minute and stir, then heat 30 seconds more if needed until the sugars dissolve and mixture is smooth and pourable.
Stir in vanilla extract, fold in Special K cereal, and mix until cereal is evenly coated while mixture is still warm.
Turn the coated cereal mixture into the prepared pan and press down firmly and evenly with a spatula or measuring cup to form a uniform layer.
In a medium microwave-safe bowl, combine chocolate chips and 1/4 cup peanut butter. Heat 30 seconds on high, stir, then continue in 20–30 second bursts until smooth and glossy.
Pour chocolate over the cereal layer, smooth, then scatter bite-sized candy pieces over the top. Cover loosely and allow to set at room temperature for about 4 hours until chocolate is firm.
Last Step: Please leave a rating and comment letting us know how you liked this recipe! This helps our business to thrive and continue providing free, high-quality recipes for you.
Leave a comment & rating below or tag
@feastara on social media!
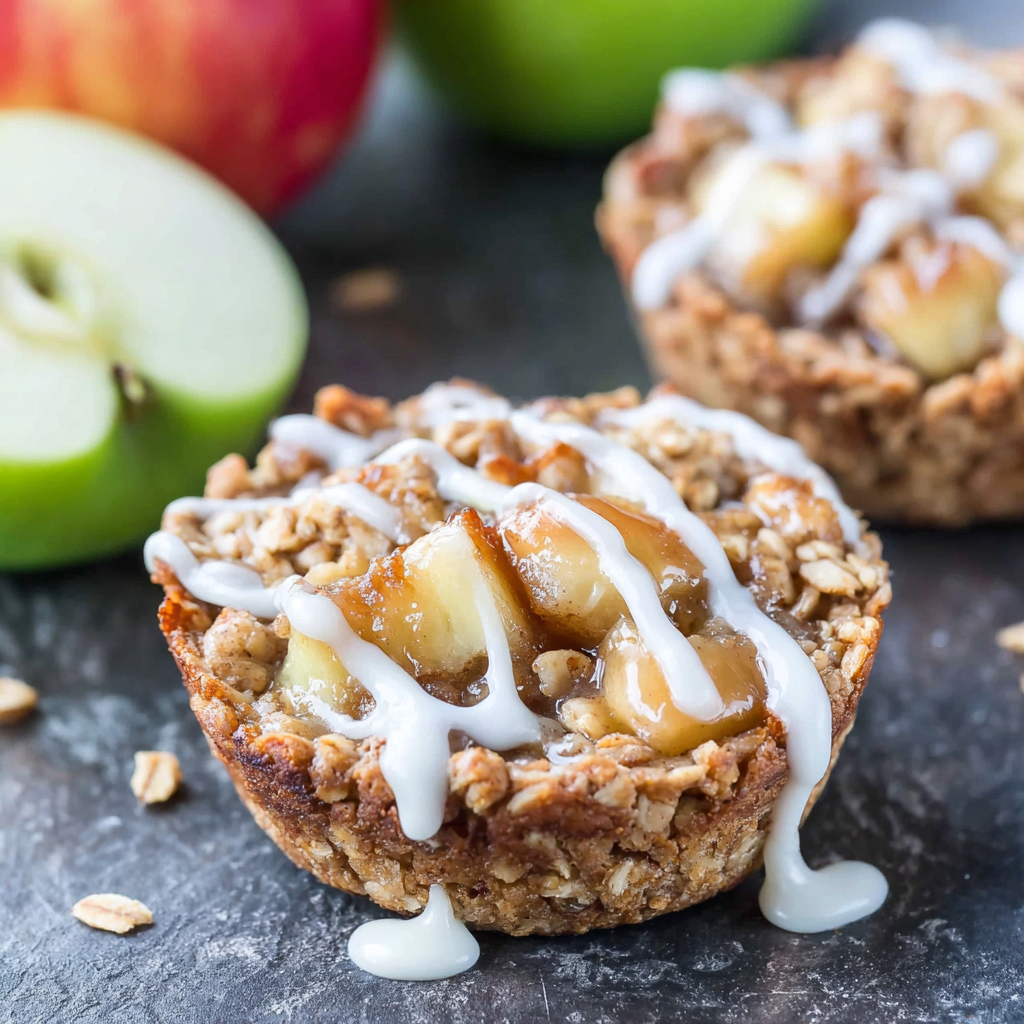
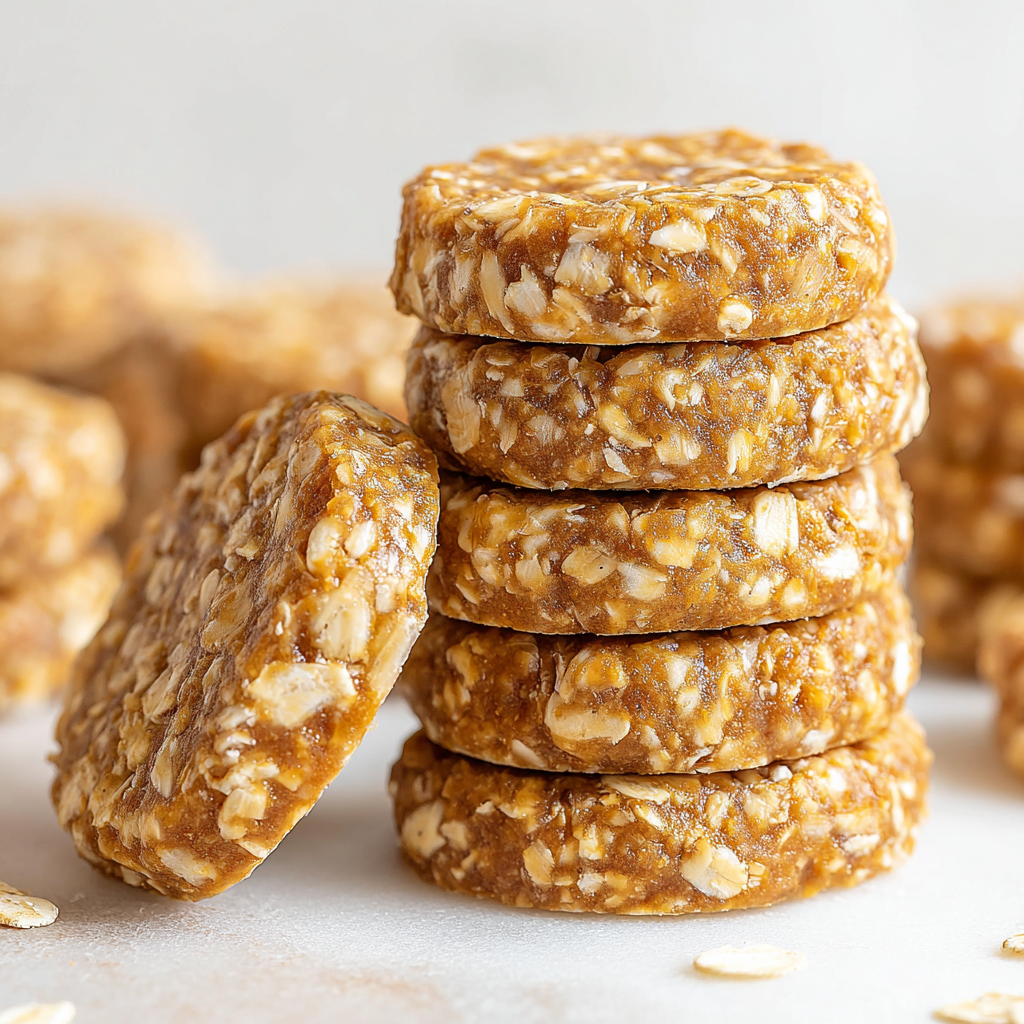
Buttery oatmeal cookie cups filled with warm, cinnamon-spiced apple pie filling and a sweet glaze for cozy, handheld comfort.
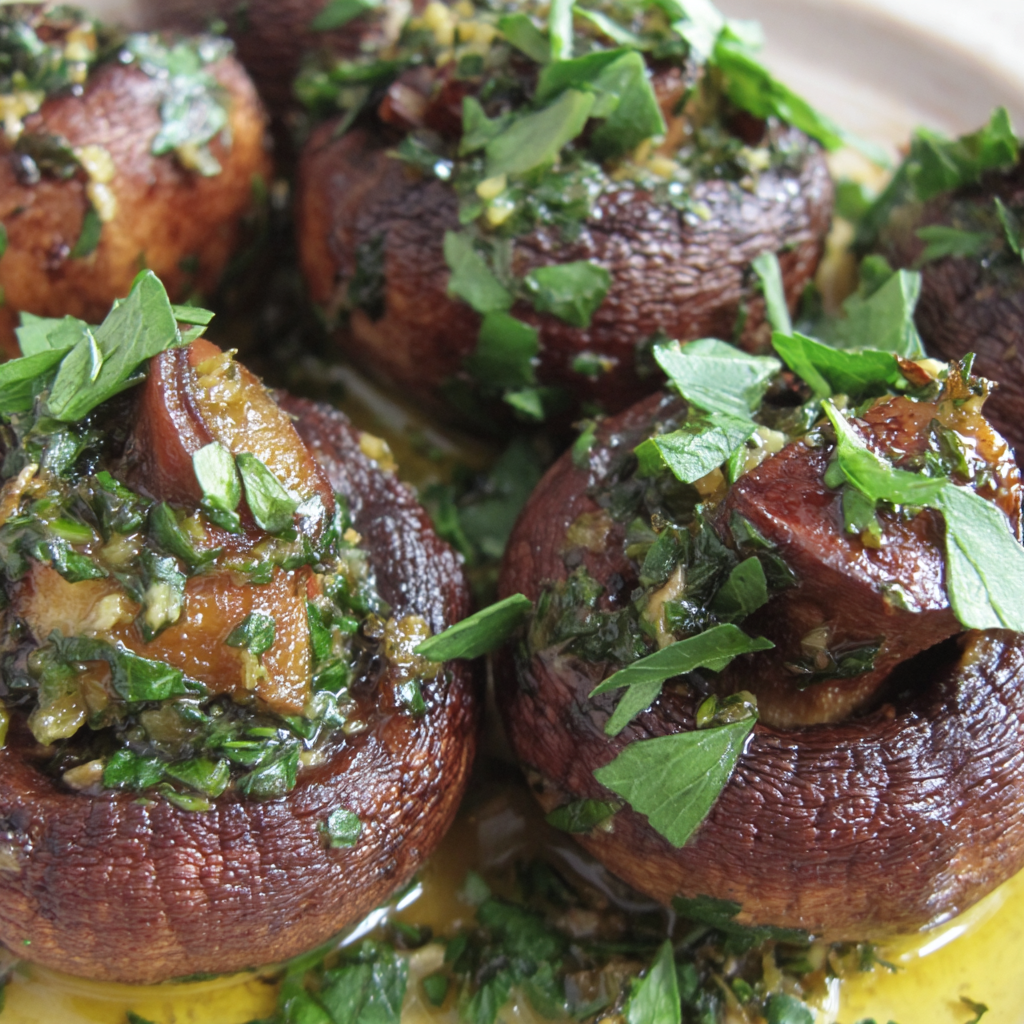
Tender mushroom caps filled with garlicky Provençal herbs, bright lemon, and olive oil. A cozy, elegant AIP-friendly appetizer ready in under an hour.
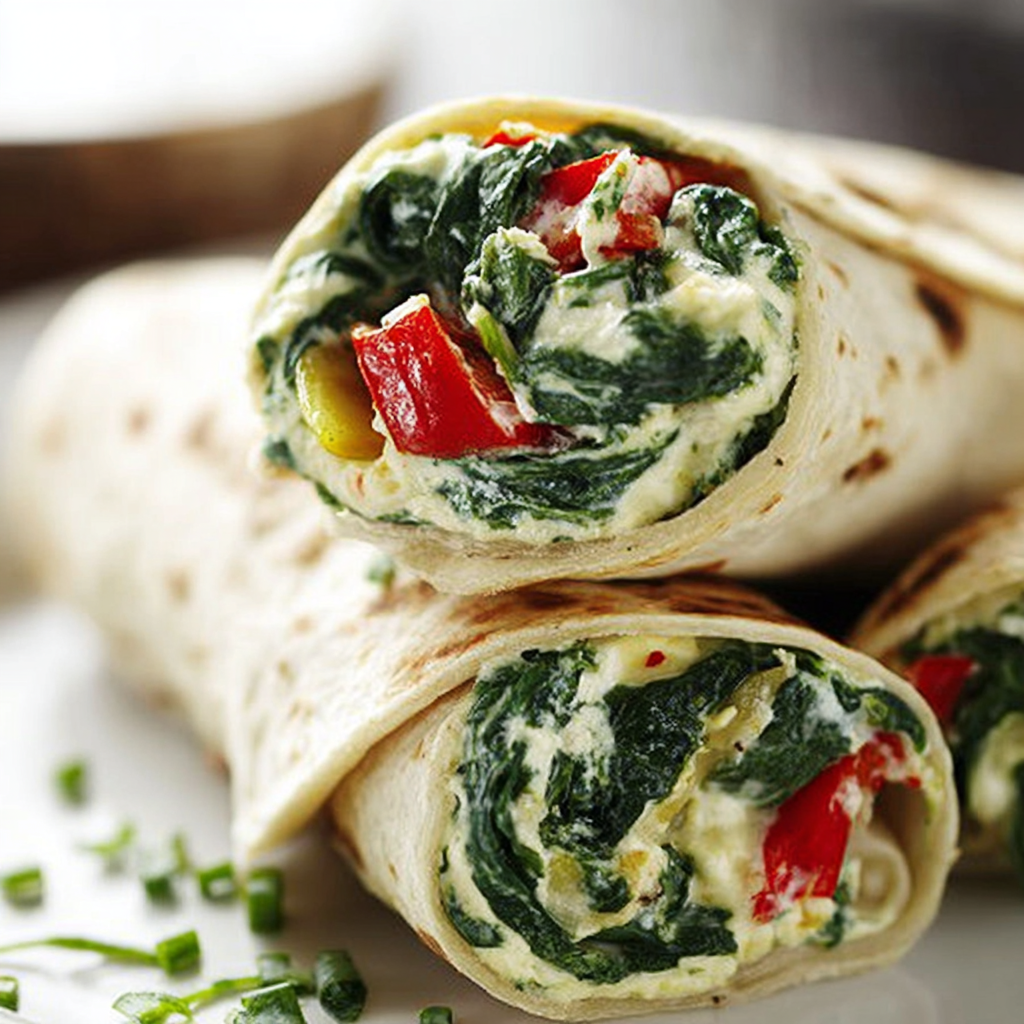
Creamy spinach, peppers, and tangy feta tucked in warm tortillas, baked golden for an easy make-ahead lunch or freezer-friendly snack.
Leave a comment & rating below or tag @feastara on social media!
Enjoyed this recipe? Share it with friends and family, and don't forget to leave a review!
This recipe looks amazing! Can't wait to try it.
Comments are stored locally in your browser. Server comments are displayed alongside your local comments.

Join to receive our email series which contains a round-up of some of our quick and easy family favorite recipes.